Sunday, September 11, 2011

Art Gallery Show!

I’m happy to report that the Picasso’s Basement Kids is having it’s fist Gallery Show at the Scotch Plains Public Library on Bartle Ave in Scotch Plains, NJ (for all you local art lovers.) The artwork will be on view through Saturday, September 17th.

Our First Group Pose!

Our Gallery Opening was this past Saturday.  It was a huge hit thanks to the talents of many artistic kids and their very lovely and generous parents. (A special shout out to Lisa and Lorri who brought us AMAZING cookies and delicious sparkling juices and kisses to Claudia and family who trekked in from afar.)

Thanks also to the staff of the Scotch Plains Library who were lovely, helpful and generous with their time. And to any patrons we may have disturbed with our enthusiastic noise: my sincere apologies!

Artists in front of their sarcophoguses
wearing shirts made at camp!
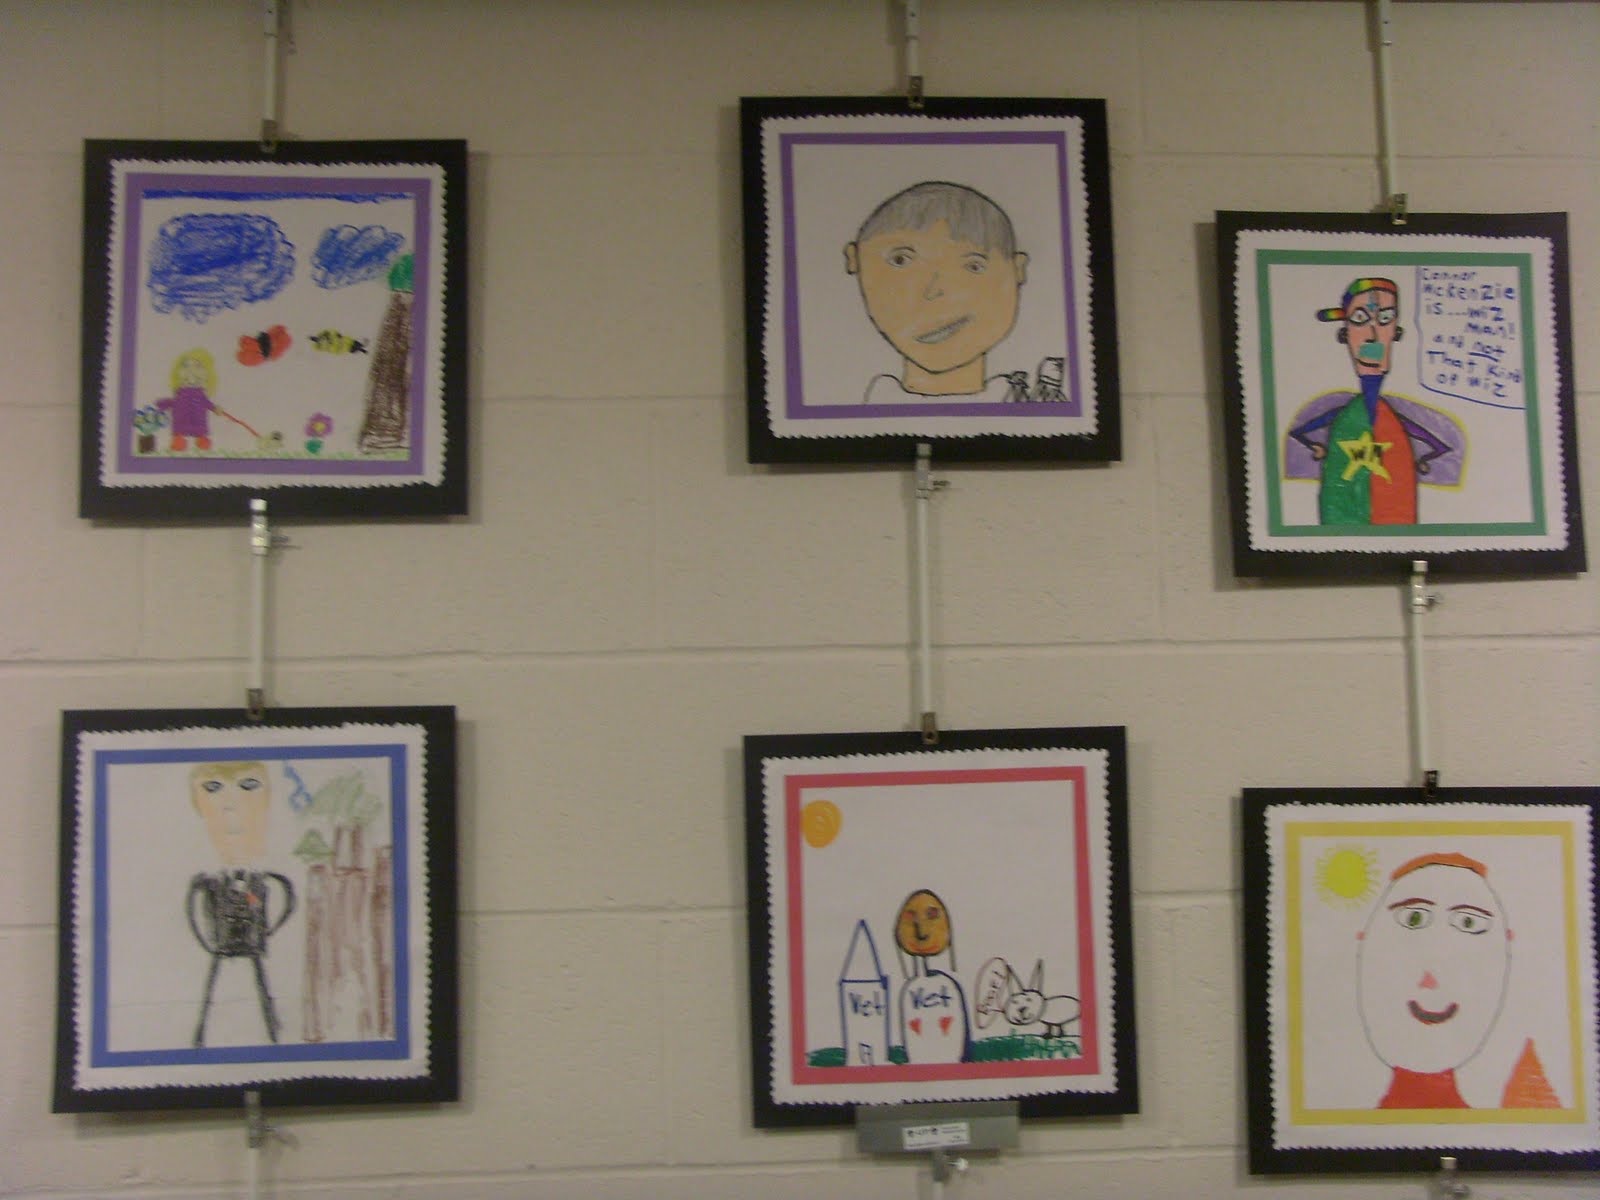
The children were excited to share their work and trade Artist Business Cards that I made using their Postage Stamp Self Portraits.
If you can’t make it to the show here’s a little sampling:

 Shadow Puppets

Postage Stamp Self Portraits

Tuesday, September 6, 2011

Russian Architecture

Russian Architecture: Day 2 of Art Camp

Time to recap another day of my first Picasso's Basement Art Camp.

On the second day of art camp we traveled to Russia. We looked at Russian architecture, some of which is noted for it’s Byzantine influences. Many of the more famous structures feature onion domes, bold colors, and arches. Working with only recycled items (shoe boxes, food boxes, paper towel rolls, and soda bottles) and some plastic baseballs covered with Paper Mache the artists began to paint patterns with craft acrylic paint. When it dried later they became architects and worked as a group to assemble their structure with I helped them glue together with a hot glue gun. VOILA!

Russian Building
Snacks were just sad that day. The children helped me bake (what should have been) delicious Russian teacakes. Unfortunately, I’m not Julia Child and I measured the flour incorrectly. They smelled delicious but they looked like this:
Bad Teacakes

Good Teacakes
Luckily I had a little of the batter left and I added some more flour. The next day we were able to enjoy them.

Nesting dolls were the next order of business. I used manila cardboard to cut out the shapes of nesting dolls and the children made all sorts: animals, constellations, and EEEK! serial killers (because when you don’t watch the kids as you clean up, those pop-culture themes just creep right in!)  But I won’t bother showing them here. The kids had fun with them but truthfully a good part of their energies that day were used on the Byzantine building. 
Lesson learned: One good project is all anyone needs!

Friday, September 2, 2011

WHY THE NEW BLOG TITLE, PAULA?


I am changing my blog title from Artburbia to “Picasso’s Basement”. The old title worked for me while I was finding my way in the art teaching world, balancing parenting, suburban living (which at times still felt foreign to me after my years in Brooklyn, New York), illustrating, and learning how to teach.
Now that I clearly have found my groove with this teaching business and I seem to be spending all my time thinking up new lessons it feels like it’s time for a change. My art classes are called “Picasso’s Basement” so it seemed only natural to pick that for a new title.
I’m curious to see if you like the change. What do you think of the new title? Is there a time that you found you wanted to change something in order to reflect what was happening in your own life?

Thursday, September 1, 2011

Around The World With Picasso's Basement! First stop: New Zealand

I’m incredibly excited! I am planning Picasso’s Basement first Art Show complete with a Gallery Opening. (Yes, I'm excited enough to feature BOLD TYPE!) It will be held at the Scotch Plains Library in N.J. on Saturday, September 10th from 1:30-3:00pm and the work will remain on view afterwards. Highlighted will be the art created during our weeklong Around the World Art Camp.

This was my first attempt at an Art Camp and I’m thoroughly convinced that I had even more fun than the kids! Each day we went to a different country, created a piece or two of art, had an appropriate (although at times disastrous) snack and played games. It was hard narrowing down the countries and I did my best to vary it up. This week I’ll try to do a post for each day. Most of the lesson plans were self-created and most of them were even successful.  Less successful was attempting to get my older son to man the phones. Many thanks are owed to my wonderful teen assistant, Nancy, who helped all the kids and kept me from making too many mistakes!

OK: Here goes the week! 

DAY 1: NEW ZEALAND, The Maori People and their art 
After learning of how the Maori people traveled to New Zealand and were it’s first inhabitants we looked at their absolutely gorgeous art. Exquisite intricate carvings, amazing tikis, and beautiful tattoos. Virtually everything the Maoris wore, lived in, or used was adorned with incredible swirling designs.

The Artists looked at pictures of the Maori sea monster, the marakihau, a mermaid like evil creature that was thought to have a hollow tongue that could suck up the sea, boats, even men! Using pencils they sketched pictures of their own sea monsters and then created a finished drawing with oil pastels. Then, using a black tempera wash, they painted their papers. Pop! Nothing like a little water-based resist to make your oil pastel colors really stand out!


Following that we drew facial tattoos.
Even the Maori women tattooed their faces: in fact some still do. The kids enjoyed their tattoos a heck of a lot more than the “banana scallops” that we made (think Fried Plantain Ala Kellogg’s). Most of them chose Goldfish crackers instead. Ah well, more for me!

Campers sporting facial tattoos. I'm not sure if their parents were happy about this!

As a last activity we looked at the huge variety of tiki faces and everyone made a tiki necklace out of recycled paper. We “laminated” them with clear contact paper and by the end of the day we were a mighty festooned bunch!

Whoa. I’m exhausted just thinking about all we did! But I guess it wasn’t TOO much activity because they all came back the next day!

IN OUR NEXT INSTALLMENT: Picasso’s Basement’s trip to Russia! See you back here for more fun!

Saturday, July 23, 2011

Step Right Up, Ladies and Gentlemen!

I have a little thing for circuses and sideshows and carnivals. Everything about them: the colors, the noises, the barkers, the incredibly greasy food, and the brightly colored rides. I’m not in love with the huge circuses but prefer the smaller wackier ones. (And yes, I plan to use the work wacky at least once in all my blog posts.) I like the small town shows and the few existing side shows with promises of two-headed ducks and sword swallowers.

And I LOVE LOVE LOVE the artwork.  Everything from old circus posters to carousel horses to the brightly colored rides. They are so uniquely American. 

In Coney Island there is not only an operating traditional ten-in-one sideshow but there is also a class to learn banner painting. I dream of taking this class if only to be with others who love side show banners as much as I do. But in lieu of this I thought it would be fun to teach my Picasso’s Basement students about side show banners.

I had to carefully select the images to show them because some of the acts were pretty…well…out there. Early sideshow art could feature oddities that might not be suitable. We focused on people with special abilities and animal oddities: the tall man, the snake charmer, dancing ducks, and 3-tailed mice.

The students noted that almost all the banners had red borders painted around them. Since it wasn’t unusual for people to find that they’d been tricked into paying to see acts that were nothing more than taxidermied animals or mannequins, the banners often featured large circles bearing the claim “ALIVE!” to entice the patrons.

The children came up with all sorts of wacky (see! I told you) characters: Turtle Man (complete with top hat and briefcase), Pencil Sharpener Nose Girl, Flying Man, etc. We used large sheets of brown craft paper to give our posters an antique feel. First we sketched in pencil and later used acrylic craft paint that is thinner than tube acrylics but opaque and dries quickly. It’s also inexpensive and frequently on sale at local craft stores. It’s my new favorite for teaching but that will be another blog post!

Some of these are still being worked on but here's our first result:


THE FLYING MAN!  ALIVE!!!!

Sunday, July 3, 2011

This Is Not A Marker

My students love markers. Why? Beats me. I do like using an archival non-bleeding pen for my illustrations but as a child I was never a marker fanatic. Always preferred pencils, paint and collage, etc. Perhaps the marker selection wasn’t as abundant when I was a kid. Did we only get tiny packs of primary colors? I don’t remember. But I do know what a challenge it is to get some kids away from the markers. Some of my kids challenge me when I pull out any other material.

So my goal for my last single summer class before my upcoming Picasso’s Basement Camp in August was to come up marker project that I loved and thought they would enjoy.
Let ‘em go marker crazy!

I did a little thinking and, although I did alter it, in the end I have to credit one of my favorite art teacher blogs called There's a Dragon in my Art Room http://plbrown.blogspot.com/ for this lesson. She leaves this project for her substitute teachers because it is so easy to set up. But I fell in love with it for several reasons:  
  1. It involves a lot of creativity. 
  2. It encorporates recycling. I’m a recycling freak.
  3. It requires very little prep work. Always a nice factor in the summer. 
  4. It allows the kids to work with those darned markers.


First we read a wonderful picture book called Not A Box by Antoinette Portis. Simple plot: A rabbit is sitting in a box and is asked “why”. Because it’s NOT A BOX! It’s a ship. Why is he sitting on the box? Because it’s NOT A BOX! It’s a volcano! The book was for much younger children than those in my class that day, but I was surprised to find that they enjoyed predicting what the rabbit would do next with the box and were also quick to guess the moral: With some creativity and imagination you can make something into something else!

I dug through my collection of scratched and damaged CDs for this project, but also set out a pile of recycled soda bottle caps.  I kept a hot glue gun handy at a safe distance from the kids.
I pre-glued the CD’s on large sheets of heavy paper using the glue gun. The Picasso’s Basement Artists were told that they weren’t CDs and that their assignment was to surprise me by turning them into something else by drawing around them. With markers. (Imagine the delight of those marker-loving kids!) I gave them the option of adding bottle caps.

I also suggested that they could title their work.
Gentle readers, kindly remind me that in the future I should specify that they put the title and their names on the BACKS of the drawings. Luckily in this case the titles seemed to add to the wackiness of the artwork! Here’s a sampling of the pictures they came up with:

The Space Craft 

The Space Ship
The Eyeball
The Lady Bug


Monday, June 13, 2011

Please Draw!

Until I post my next exciting entry please direct yourself or your children to this link. It's so much fun! You can draw and paint on the computer, frame your picture. I drew a knobby knee-d chicken which I then placed in a bright insanely ornate virtual frame, and hung it in a gallery. What could be better?

http://artpad.art.com/artpad/painter/