Tuesday, January 1, 2013

A Cheery 2013 to You All

I don't consider myself to be superstitious  but I do love the number 13 and I'd like to think that it's my "lucky number". I've had a surprisingly number of happy events occur on Friday the 13ths and so I would looooove to hope that the year 2013 will be a wonderful year. For all of us. I suppose my ancestors from the old country would think that I was tempting fate by voicing this hope. So when I'm done blogging I'll go throw some salt over my shoulder and find some wood to knock.

A nice way to welcome in the New Year is some bright cheerful flowers. And nothing says cheery like flowers created by my 4-5year old class. Toss in some bright colors and recycled objects and you have the makings of some uplifting artwork.

 I had the young Artists select colored papers and create vases from card stock. I wanted them to draw the vases themselves and cut them out themselves. They often want me to cut items for them but, darn it, these are skilled Artists and they need to recognize that they can control those scissors!

I showed them paper with low-key colors: cut up paper, ripped up vintage maps (which have lovely pastel colors) and plain paper. I gave them scissors and paper punches to make shapes. Some chose the punches, others went to town cutting and ripping. They used these to collage their vases. Then they placed their vases against some high-key colored backgrounds. They chose bright red and blue. They painted cut up cardboard egg cartons in low key colors to match the vases and glued the vases and flowers down on the paper. Then they chose recycled objects to fill the flowers: buttons, shells, etc.

I explained that it would be nice to place their flower vases in space rather than have them float around and they all drew in a horizon line or table top. They were then able to "decorate" their tablecloths. Most chose to use marker although one Artist glued down buttons. Didn't they do a wonderful job?


A HAPPY AND PEACEFUL NEW YEAR TO YOU ALL! 

Now off I go to find some salt to throw and wood to knock on. 


Friday, December 21, 2012

How To Teach Figure Drawing Without a Model!

I always have a few kids who really want to know how to draw people. Makes sense, yes? It's my favorite thing to draw too. But try as you might, you really really really need them to look at a model. Both in school and out I've spent countless hours at Life Drawing classes. Problem is the models are unclothed. NOT what you'd want for a class for kids.

I've tried everything over the years: having them look in the mirror (not too successful except for self- portraits), making my own kids pose for the class (only a good idea if you have kids that are NOT mine--one refused and the other one wriggled so much I might as well have had the artists draw weasels), cutouts from Fashion magazines (here the clothes so overpowered the form of the body that the kids went right to stylizing the figures.)


And then---DUH---it hit me. The wonderful internet. I did a few searches and finally came up with some fabulous clothed non-fashion models with interesting poses.


I explained gesture drawings to the students. They each had 1 minute with each photo, then we switched. Then they had 5 minutes with a picture. Switch. It was the best way to replicate an actual Life Drawing class where the models usually start out with short poses.

These are all from one fabulous artist because my other shots didn't come out (sorry girls!) but I'll post more the next time we do these. 

Good job, Excellent Middle School artist!


New Picasso's Basement Website! Woo-hoo!

I am pleased as punch to introduce you to my new Picasso's Basement website!!!  (That's right. Click the link. You know you want to!)
Come learn more about Picasso's Basement and, by all means, hire me to run a program for you!

     Pass this on to your friends who want to throw their kids a party! I can run a fabulous art party. 
 
     Tell a buddy who owns a preschool! I am happy to teach a class for them.

     Let your local parks department know about it. I am running afternoon classes in the Fanwood park buildings but will travel locally!  

    Recommend me to retirement or assisted living communities!  I can come in to help make a memory box with the seniors that they can share with family or use to honor a special person or moment in their lives.


A big hearty hug and thank you to my friend Lyuda Luvrentyeva who designed the site. She is an amazing illustrator to boot. (Right, you know the drill. Click her link too! She likes to work!)
She worked hard into the night while I bombarded her with pictures of artwork and artists. She pored over fonts and tolerated my lack of technical know-how. Plus she fed me very very good bread.  THANKS, LYUDA!  

Monday, December 3, 2012

Master of Disaster Projects (AND A GIVEAWAY!)

It is rare that I swipe a project directly from another blog or website but this one bore the markings of everything that is good in a project:
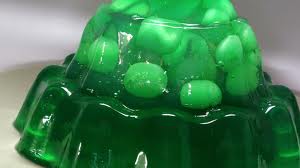
Not THIS gelatin

  • Creativity
  • Surprise
  • A folky home method of creating a professional item
  • Nature
  • Jello

Even when I do get a project from another site I usually try to put my own spin on it but this looked so gorgeous. PRINTMAKING ON GELATIN SHEETS. Sounds like fun! Sounds challenging but exciting!  Check it out here at Cassie Stephens' blog.

Gorgeous, right? I imagined my students looking at me with new-found admiration and a greater understanding of the printmaking process.

What? What was that you're asking? GO BACK? Go back to the list of features? 

Yes, I did say Jello.

Well, not the yummy kind of jello you had as kid. Of course I was thinking that. Delicious pretty friendly jello. I'd eaten it for years. My mom made it. My kids loved it. Good ol' fashioned jello.

NOT THAT JELLO.

This kind:

I know. I know what you're thinking. 
Regular Jello IS this kind of jello. Yeah, but it's bright and cheerful and smells good. And I'm not a vegetarian and I'm not kosher so what's the big deal?

Well here's a tip:  If you start working on an art project and it makes your kitchen smell like a bone yard then you should STOP RIGHT THERE. 
Making 3 trays of gelatin took 36 pouches. That's right. 36. And my kitchen smelled like ground pig. 

Do you really want to keep reading? Well, I'll do you a favor cause it's a painful tale of woe. (I almost wrote tail. That wouldn't have really been funny, would it?) I'm gonna sum it all up in a list of chain of events. To make it more dramatic I'll talk about myself in the third person, like Bob Dole:
  • Paula makes up list of items needed to do project
  • Paula calls local art supply store in advance which promises her they HAVE printmaking ink.
  • Paula gets all supplies. 
  • Paula cooks 36 packets of smelly nasty gelatin and fills 3 cookie sheets.
  • Paula spills some on floor. Dog races over and laps it up. Dog vomits.
  • Paula cleans vomit. 
  • Paula goes to parent-teacher conference for 9 year old, runs a little late.
  • Paula races to art supply store, just hours before her Mixed Age Group class is to arrive.
  • Art supply clerk takes her to printmaking ink aisle. No printmaking ink. Only ink for stamp pads.
  • Paula DOES NOT hurt the clerk or the apologetic customer service aide who tells her no one there knew what printmaking ink WAS. 
  • Paula panics and substitutes tempera paint.
  • Students arrive. Paula shows them leaves and pictures of the glorious pieces we will all make.
  • Paula inks up nasty gelatin tray with tempera paint, students apply leaves, make first print.
  • Gloopy paint slithers under leaves, making ALL prints black.
  • Paula and students try many methods to make it better. They try printing other things. 
  • Students discover that printing shells do nothing but leave you with a tray of shells embedded in gelatin.
  • Paula tells students to wash trays, we are going to try something different, neglecting to say USE COLD WATER.
  • Hot water causes slimy gelatin to pour off trays and into now-vile slop sink.
I'm going to do you another favor. I'm not going to show you our "prints". Use your imagination.

THE MORAL OF THE STORY: Never create art projects that require cooking. Always have wonderful students with a good sense of humor. And be ready with a nice glass of wine to down when all the students go home. 

Do you have a MASTER OF DISASTER PROJECT you care to share?  If I get at least 5 submissions I will pick the most vile and send them one package of Mr. Clean Magic Eraser Cleaning Sponge.
THE RULES: 
May the most heinous project win!


Wednesday, November 28, 2012

MORE Face Jugs!

Before painting
In a previous post I shared our Face Jug project made from recycled jars and clay. The artists worked really hard on them. They were so incredibly varied and whimsical. Some were a little crazy looking, which is pretty appropriate considering how insane traditional face jugs can be.
 Here's a few more to share with you all. 
Enjoy!

Face Jugswaiting for their glaze to dry.
Add caption


Still to be painted.
Whiskers were made from
paper clips. 


Monday, November 26, 2012

Comic Book Class 101

I've been teaching Comic Book Class through our Town Recreation Department. Those of you who know me may be surprised. Although I am an illustrator (see? I even have a WEBSITE!) I have never been a comic book artist. I do, however, love comic books. My love started back in the 1980's when I'd snarf up copies of RAW Magazine, a compilation of alternative comics compiled by Art Spiegelman of MAUS fame. I became a huge fan of graphic novels but it wasn't until I had my boys that I began to appreciate more traditional comic books.
Sketching out some ideas

Now, of course, my 9 year old and I are regulars at the local comic book store. After about a billion visits to the store I found myself reading up on how comic books are made, a little about the history, and a lot about the art. And I saw my son start to create his own comic books. I tried to guide him a little on how to put together the story, how to use lettering creatively, how to include action and details, how to work with pacing and planning, later on how to ink and color. Suddenly I had the structure of a class. 

It's a class that is a pure joy to teach. The kids come in excited, ready to work, enthusiastic to share. We do exercises in story crafting, layout, sketching, figure drawing, adding expression and much more. Each artist
creates a book that I send out for printing. 

Here's a sample of some of the wonderful work created by the Picasso's Basement Comic Book artists.
This group is entirely made up of 2nd-to-4th graders!


 I'm fortunate to know some amazing artists who have come to share their work with our class.

Marvel Comic Book Artist Bob Budiansky visits and wows the class!

An animated group after an activity that focused on details in our stories!
I can't wait to share more of their work with you!

Sunday, November 25, 2012

Face Jugs and a Hurricane

Last night I dreamt that a nasty hurricane hit the East Coast, knocking out power, taking down wires, leaving people cold and cranky and bored and hungry. And then I woke up and remembered that it all was real. Such a crazy time and this Thanksgiving I had to be thankful that the worst that happened to my family was losing heat and power and having our schools closed. We were cold and bored but we had friends that lost property, faced terrible cleanups, were left temporarily homeless. Many people lost their homes, their cars, and were left in terrifying situations. I'm truly grateful that my family remained together, safe and secure.  I'm also grateful for the workers at the utility companies, the townships, and the volunteers that are still working trying to help get everyone back in their home

Last week my kids finally returned to a full week of school. And as I clean out my studio and straightened up my supplies (which, being in the basement, all ended up on top of my work tables to protect them from any possible flooding) I've found many projects that I should share.

I always like to break up my posts so I'll share one with you all here and post more later. 


So let's talk about FACE JUGS.

Jugs and urns with faces on them can be found in many cultures going all the way back to the ancient Greeks and the Egyptians. They were often crafted by African American slaves in America and there's speculation that they were used almost as a burial memorial because slaves were not allowed proper funeral markers. They later became a common American folk art. They are often grotesque or goofy and sometimes feature human teeth!

The Picasso's Basement artists looked at many pictures of the jugs. They each chose a recycled glass jar or bottle to work with and a big ol' hunk of Prang Das Modeling Clay which is  a little pricey but excellent because it doesn't crack and crumble like most air-dry clay. (Just see my Terra Cotta Warrior post to see what disasters await when you use the wrong clay.)

Zombie Pig Pencil Holder Face Jug/Front
They painted them with acrylic paint and later glazed them with Modge Podge.
Zombie Pig Pencil Holder Face Jug with 2 tails/Back


I always encourage the Artists to just go to town with their imaginations. I think you will see that they certainly did! I'll feature some more of them on my next post.