Showing posts with label Art Teacher. Show all posts

Wednesday, February 15, 2012

Hat Day with a nod to Ezra Jack Keats


You've heard me go on and on about my love for Ezra Jack Keats. As a little girl I loved his book Jennie's Hat. The story was charming but what interested me the most were the pictures. Keats used beautiful papers and collage and simple drawings and I was completely enthralled.


So when I started teaching a preschool class I was jumping at the chance to share my enthusiasm for the book. It helps to have the most wonderful students in the world: attentive and interested young artists. We started by reading Jennie's Hat. I pointed out the endpapers in the books. The artists looked at the many hats pieced together with flowered papers. We discussed the silly things we could put in our own hats if we drew them: pizza, pets, grapes.
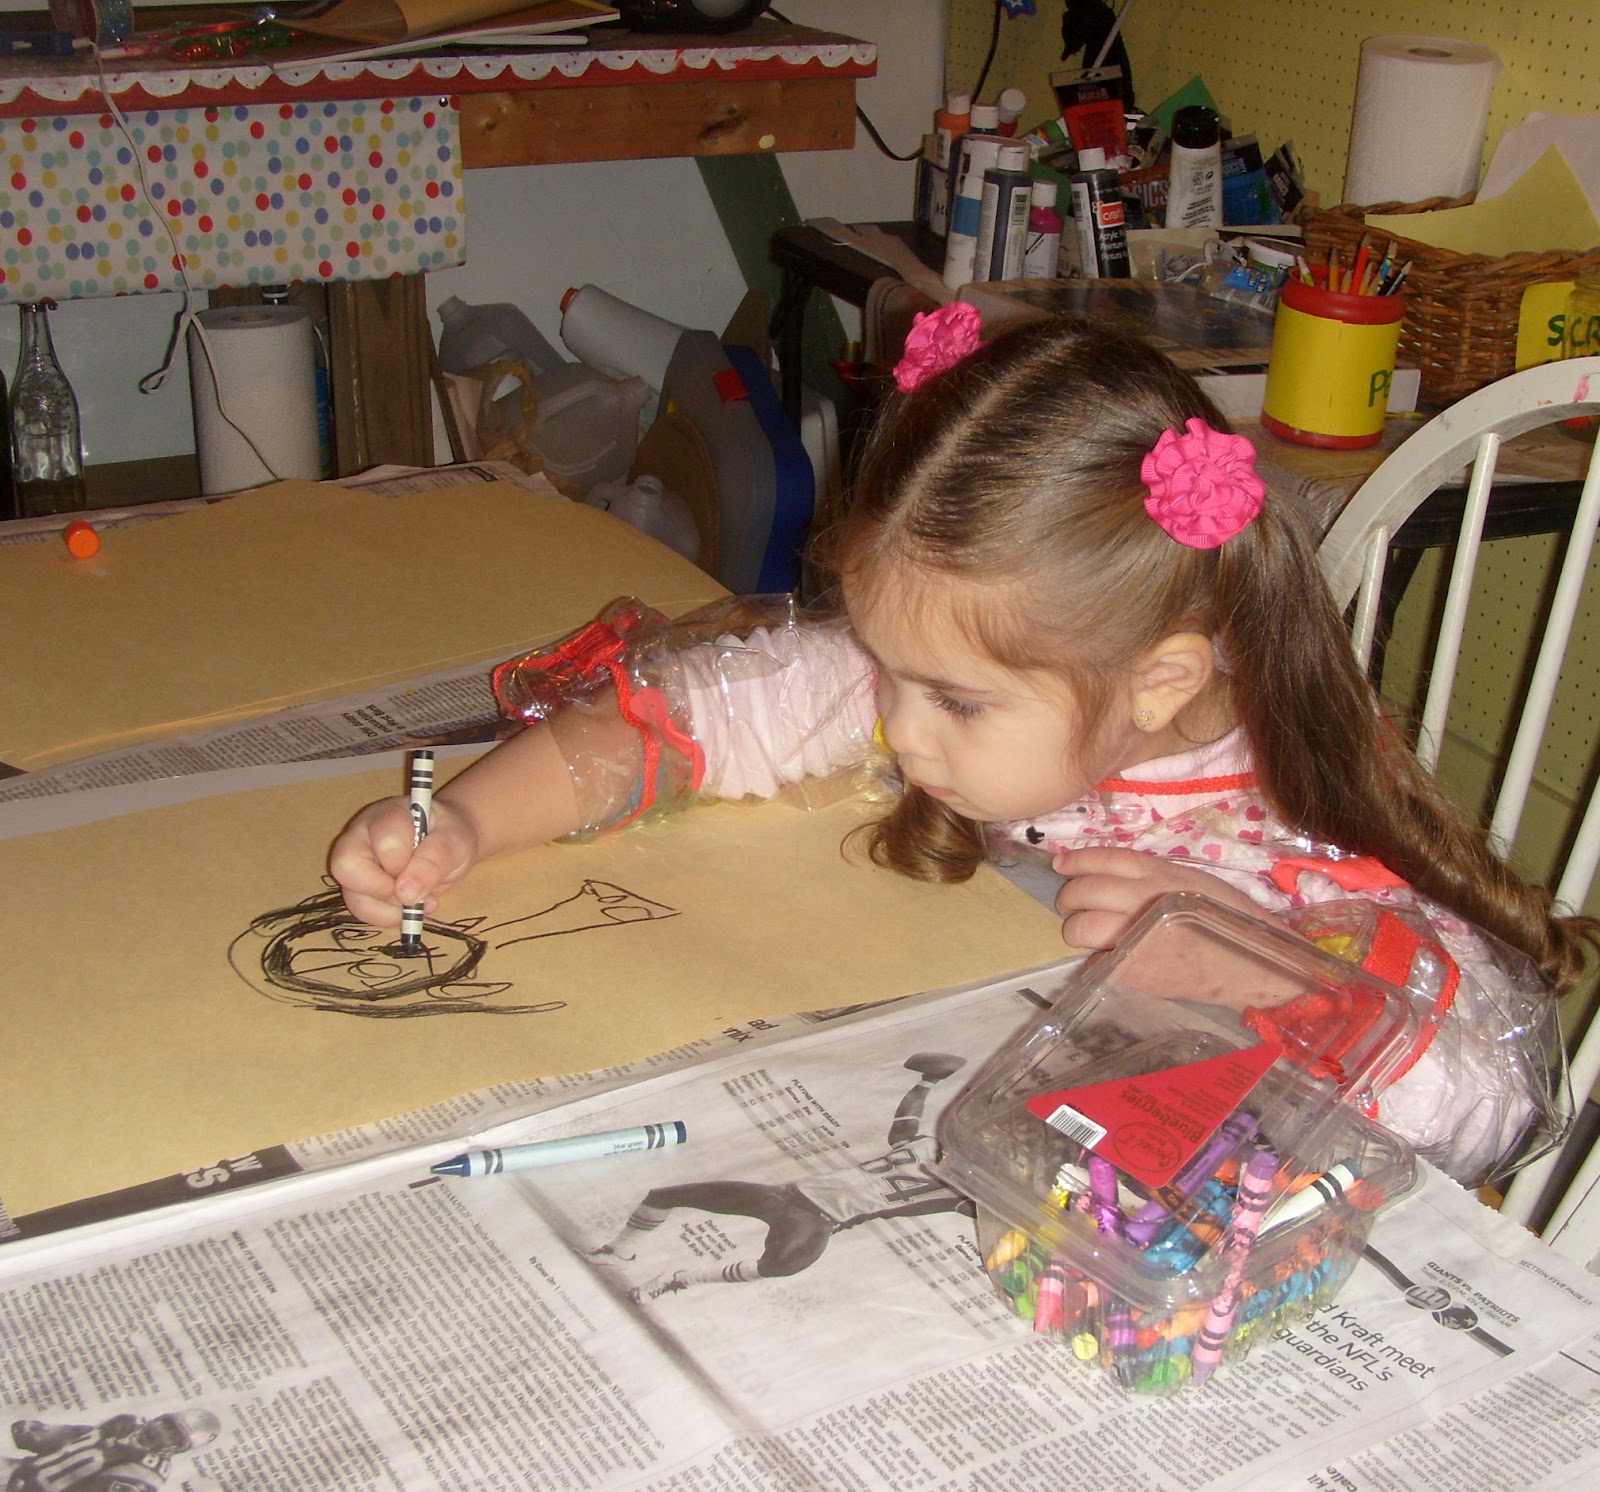
A Picasso's Basement Artist hard at work


The artists started drawing faces on large paper. Then they glued large cut out hats made of manila paper which was heavy enough to support a collage. Using magazine clippings they filled their hats. Pictures of flowers, cats, dogs, candy, ribbons, cookies. One young artist suggested we add glitter. Thank heavens we're in a basement! It was a glitter fest like I've never seen. I've never been a huge glitter fan but it worked perfectly for this project!

I think the artists did an amazing job.


Check out the fantastic hats they made!

Hat festooned with dog and hot-air balloon.
Flowers and Glitter and a fairy

Doggy wearing a hat!


Thursday, February 2, 2012

The Joys of Pinning!

I am not usually inclined to recommend websites unless they belong to wonderful artists, teachers or cooks. OK, I take that back. I can blather on endlessly about an awful lot and I probably DO end up recommending sites. But not on my blog.
A Group of Boards on Pintrest

I must now make an exception. Pintrest. My new obsession. I thought it was just a cute idea at first: a site that allows you to pin virtually any picture or link onto virtual bulletins. I started with a few of my favorite subjects: Making Stuff, Vintage Cereal boxes, Roadside America, etc. Then I noticed that Art Teachers were using it to collect lesson ideas. So I set up ONE and only ONE board called Art for Kids. It grew. I started finding wonderful ideas. Crazy imaginative people were out there pinning and I could repin their pins. They could repin mine. Some late night frenzied pinning was going on. I became a pinatic.

Now I find it downright inspiring. AND helpful. I have many many art lesson boards now: broken down by grade, subject matter, even material. I found myself sort of getting to know other artists and instructors by their pins. I see a wonderful lesson and think "Oh, that Abigail is so clever" or "Wow, Thadeus is really edgy". And I steal their ideas. Legally. Woo hoo!

It might only be my virtual reality but Pintrest makes me feel organized and inspired. Heck, how often can you say that about a website?

If you're a fellow pinatic please comment and let me know what you like the most about it.

Friday, September 2, 2011

WHY THE NEW BLOG TITLE, PAULA?


I am changing my blog title from Artburbia to “Picasso’s Basement”. The old title worked for me while I was finding my way in the art teaching world, balancing parenting, suburban living (which at times still felt foreign to me after my years in Brooklyn, New York), illustrating, and learning how to teach.
Now that I clearly have found my groove with this teaching business and I seem to be spending all my time thinking up new lessons it feels like it’s time for a change. My art classes are called “Picasso’s Basement” so it seemed only natural to pick that for a new title.
I’m curious to see if you like the change. What do you think of the new title? Is there a time that you found you wanted to change something in order to reflect what was happening in your own life?

Sunday, July 3, 2011

This Is Not A Marker

My students love markers. Why? Beats me. I do like using an archival non-bleeding pen for my illustrations but as a child I was never a marker fanatic. Always preferred pencils, paint and collage, etc. Perhaps the marker selection wasn’t as abundant when I was a kid. Did we only get tiny packs of primary colors? I don’t remember. But I do know what a challenge it is to get some kids away from the markers. Some of my kids challenge me when I pull out any other material.

So my goal for my last single summer class before my upcoming Picasso’s Basement Camp in August was to come up marker project that I loved and thought they would enjoy.
Let ‘em go marker crazy!

I did a little thinking and, although I did alter it, in the end I have to credit one of my favorite art teacher blogs called There's a Dragon in my Art Room http://plbrown.blogspot.com/ for this lesson. She leaves this project for her substitute teachers because it is so easy to set up. But I fell in love with it for several reasons:  
  1. It involves a lot of creativity. 
  2. It encorporates recycling. I’m a recycling freak.
  3. It requires very little prep work. Always a nice factor in the summer. 
  4. It allows the kids to work with those darned markers.


First we read a wonderful picture book called Not A Box by Antoinette Portis. Simple plot: A rabbit is sitting in a box and is asked “why”. Because it’s NOT A BOX! It’s a ship. Why is he sitting on the box? Because it’s NOT A BOX! It’s a volcano! The book was for much younger children than those in my class that day, but I was surprised to find that they enjoyed predicting what the rabbit would do next with the box and were also quick to guess the moral: With some creativity and imagination you can make something into something else!

I dug through my collection of scratched and damaged CDs for this project, but also set out a pile of recycled soda bottle caps.  I kept a hot glue gun handy at a safe distance from the kids.
I pre-glued the CD’s on large sheets of heavy paper using the glue gun. The Picasso’s Basement Artists were told that they weren’t CDs and that their assignment was to surprise me by turning them into something else by drawing around them. With markers. (Imagine the delight of those marker-loving kids!) I gave them the option of adding bottle caps.

I also suggested that they could title their work.
Gentle readers, kindly remind me that in the future I should specify that they put the title and their names on the BACKS of the drawings. Luckily in this case the titles seemed to add to the wackiness of the artwork! Here’s a sampling of the pictures they came up with:

The Space Craft 

The Space Ship
The Eyeball
The Lady Bug


Monday, May 23, 2011

The Year of the Rabbit (Or “How to Make A Chinese Dragon Mask to please the finickiest of kids”)

We like to celebrate a lot of holidays at my house. Usually they are actually the ones that pertain to our backgrounds (which for my melting-pot kids is anything from Russia, Spain, England, Ireland, and Poland) but sometimes we turn to outside cultures for our festivities. We’ve hung lights for Diwali and made Dia de los Muertos cookies.  

And we always decorate for Chinese New Years. Except for this year. This year we forgot.

Months later my seven year old remembered Chinese New Year and he began to do what any poor neglected seven year old would do.  He began to hound me to make something with him. He was quite specific. He wanted to make a Chinese dragon costume. A FULL costume. The kind that usually is worn by several people. No can do, I said. But I was willing to work with him to make the mask.
It was a lot of fun and I can’t wait to make some again with my class! Here’s what we did.

MATERIALS:
  • Scissors
  • 1 Milk Jug, washed well and dried.
  • Newspaper, torn into strips. Around 1- 1.5 inches wide, the width of one page. But any size can work.
  • Water
  • Flour
  • Acrylic Paint           
  • 1 Sheet Heavy white construction paper or craft foam
  • A few additional sheets of brightly colored construction paper
HOW TO MAKE YOUR MASK:
Upside-down jug with paper mache strips painted white and ready for color!
Time to paint!

  1. Spend some time on the Internet looking at Chinese Dragon masks. Find some favorites and print them out for inspiration.
  2. Cut the jug in half from the top to the bottom.  We used the side with the handle as a “nose” (although we later decided to cut the nose off!)
  3. Measure the child’s eyes and cut eyeholes and a mouth. Take a good look at a Chinese dragon mask picture to get the right shapes.
  4. Make Paste of 1 parts flour to 2 parts water. There are other recipes involving glue or boiling that you can find online but this is the simplest.
  5. Dip strips of paper into the paste, squeeze off some excess by dragging paper through your fingers but don’t make it dry. Apply it to the jug horizontally. Continue to add more strips, allowing for overlap. Do it until the mask is covered. Use shorter strips where needed such as between the eyes. Let it dry. It will take about a full day to completely dry.
  6. Do the next layer vertically. Alternate layers. We made 3: one horizontal, one vertical and the top one was horizontal again.
  7. Cover your paste and put in the frig between dryings. You can put it in the microwave for a few seconds each time you take it out.
  8. You can start making shapes with your paper. We added horns, big lips and bulgy eyes.
  9. You can do the last stage with white paper to make it more paint-ready but I just painted the last dry stage white before applying colors.
  10. If it needs a little more drying use a hairdryer but at a distance.
  11. Paint!
  12. Once paint is dry you can glue in teeth, add strips of colored paper as a dragon mane, add feathers or whatever you like.


Here’s how my son’s mask turned out! 

Happy Year of the Rabbit!