Showing posts with label Paint. Show all posts

Saturday, March 9, 2013

SPRING: BRING IT ON!

One of the many beautiful
birdhouses created by the Young At Art Artists
I am really a big fan of Spring. It's a great season. It looks good, it feels good, it smells good. Plus it ushers in the start of the best time of year of all: Garage Sale Season. (I'll admit it. I'm an addict.)

I start getting excited about Spring pretty early on. Probably around November I'm already thinking about garden gnomes and wondering which of my garden flowers will get confused and push to the surface first. (This year the daffodils won--one fluke of a warm day and they were half-way up by mid-February.)

In Picasso's Basement's YOUNG AT ART CLASS (for 4-5 year olds) we are already getting ready! The young Artists took recycled cereal boxes and painted bird houses on them. I helped them holes in the front for the bird entrance. We glued the paintings to cigar boxes that had the lids removed. The Artists painted corks and drew in eyes and beaks to create birds and then glued them to popsicle sticks perches that we attached. They were so excited by their creations that they continued painting beautiful Spring scenes!


Anyhow, this is just a quick post to say HAPPY PRE-SPRING!  

Sunday, March 3, 2013

Sea Monsters, Maori style

Traditional artwork depicting Taniwha


I've done this project before but it's always so much fun! In my Passport to Art Class all the young Artists make passports and each class we "travel" to a different country to learn about the culture and  the artwork of that country. A few weeks ago we went to New Zeland for an hour.


Some exuberant painting!
The Maoris of New Zeland have always created amazing artwork with beautiful graphic swirls. Everything from their tikis to their facial tattoos are gorgeous.

The Taniwha are mythological sea creatures. In some stories they are protectors, in some they are vicious. But the drawings and sculptures of these beings are vibrant and exciting.

The artists in the class created their own sea monsters. Some chose to use bubblewrap and mesh bags to add textures, underwater bubble patterns, and scales. 


 And, of course, they painted some facial tattoos. 


Well done, Art Travelers!


Tuesday, January 1, 2013

A Cheery 2013 to You All

I don't consider myself to be superstitious  but I do love the number 13 and I'd like to think that it's my "lucky number". I've had a surprisingly number of happy events occur on Friday the 13ths and so I would looooove to hope that the year 2013 will be a wonderful year. For all of us. I suppose my ancestors from the old country would think that I was tempting fate by voicing this hope. So when I'm done blogging I'll go throw some salt over my shoulder and find some wood to knock.

A nice way to welcome in the New Year is some bright cheerful flowers. And nothing says cheery like flowers created by my 4-5year old class. Toss in some bright colors and recycled objects and you have the makings of some uplifting artwork.

 I had the young Artists select colored papers and create vases from card stock. I wanted them to draw the vases themselves and cut them out themselves. They often want me to cut items for them but, darn it, these are skilled Artists and they need to recognize that they can control those scissors!

I showed them paper with low-key colors: cut up paper, ripped up vintage maps (which have lovely pastel colors) and plain paper. I gave them scissors and paper punches to make shapes. Some chose the punches, others went to town cutting and ripping. They used these to collage their vases. Then they placed their vases against some high-key colored backgrounds. They chose bright red and blue. They painted cut up cardboard egg cartons in low key colors to match the vases and glued the vases and flowers down on the paper. Then they chose recycled objects to fill the flowers: buttons, shells, etc.

I explained that it would be nice to place their flower vases in space rather than have them float around and they all drew in a horizon line or table top. They were then able to "decorate" their tablecloths. Most chose to use marker although one Artist glued down buttons. Didn't they do a wonderful job?


A HAPPY AND PEACEFUL NEW YEAR TO YOU ALL! 

Now off I go to find some salt to throw and wood to knock on. 


Friday, March 16, 2012

My Big Fat Greek Vase - Part 2

A few weeks ago I showed you some of our Greek Vases from one of our classes. Check out the lesson and the first vases here.  A few friends asked me what paint I used and were these specialty vases.  So here's the low-down:

  • These were cheap vases from the art supply store, about $1 each.
  • We used craft acrylic which stays on well but is more liquidy than standard acrylic and is also very innexpensive. 
  • DO NOT use tempera. Parents of my younger students probably hoped I'd use something washable. It will work but it runs easily and if your vase gets wet you'll have a colorful puddle. 

Just a few more vases to display from a younger class. These students wanted to just be inspired by the traditional Greek vases but wanted to add more color. Just black and red paint didn't cut it for them. I still wanted them to understand working with a limited palette so I gave said they could add a little yellow and green to the mix. The boys wanted to add a little mythology and the girls went for color. Look how inspired!
Medusa!
Medusa #2!


One of my pre-school students also joined the bigger kids that day for a makeup craft and she wanted many colors on hers. It may not have been Greek but it is certainly fabulous!


Friday, March 9, 2012

Watercolor Oceans

Time for a new skill for my fabulous Middle School kids. They can draw and design. But can they feel comfortable with watercolor? Well, not at first but hopefully we changed all that last week.

One thing I've discovered is that until they play around with a new medium most kids use all kinds of paint the same way. Thick. Now here's the thing; once you master watercolors you can use them anyway you want. Go translucent, go opaque. Go to town. But the middle school kids needed to really understand what watercolor was about. Colors covering other colors or blending in or forming drips. Translucence. Cool unexpected things happening on your paper. And learning to control it as much or as little as you like.

Undersea Plant. Love the brushstrokes on the leaves!
I had them pick ocean scenes because I thought that would give them a limited palette to work with and because...well...it's an ocean scene? What's not to love? They looked at many photographs for inspiration.  They picked sea creatures and closeups of a plants.

Horseshoe Crab
I had them do a drawing on the watercolor paper in pencil before they started to paint. I encouraged them to experiment on scraps of watercolor paper but they wanted to dive right in. Fine, so long as they played around a little on the painting.


It took a lot of convincing for them to realize they could leave areas unpainted, could lift color off once it was placed down. One student was really determined to paint over the pencil lines but I convinced her that the underpainting and the light coming through was what brought her piece to life.

Fabulous work, artists!

Friday, February 24, 2012

Cigar Box Showstoppers

I can't believe I forgot to blog about this project with the 6-7th Grade Picasso's Basement Artists. This dates back to November I think.

I had toyed with doing a particular project based on the art of Joseph Cornell who created beautiful delicate assemblages within boxes. 
OK, I know I should have added a real Cornell photo here but this kept you reading, right?


Traditional Retablo


I also wanted to eventually do a project based on Mexican retablo art, devotional paintings often within a wooden box or frame to create a home alter. A recent trip to a wondrous cigar store left me only $25 poorer while I carted home 40+ stunning cigar boxes. I realized they would come in handy someday and I found the perfect project. I thought I'd wait on the Cornell and focus on the retablos.

But once I let the students loose in my art room, complete with old magazines, shells, vintage bottle caps, antique cards, little wooden findings and boxes of old door knobs, they let their imaginations take over.

I'm sorry to say I only have pictures of 2 of the boxes but they are pretty incredible!


Glad being a craft-material hoarder has finally paid off for someone!


Tuesday, September 20, 2011

Draw Like an Egyptian

OK, OK, I know it's a TERRIBLE title for this post. Sometimes you just have to follow your heart.

Day 3 of Art Camp: Sarcophaguses

This was a very ambitious project for one day. Maybe too ambitious. But it worked out pretty well. 

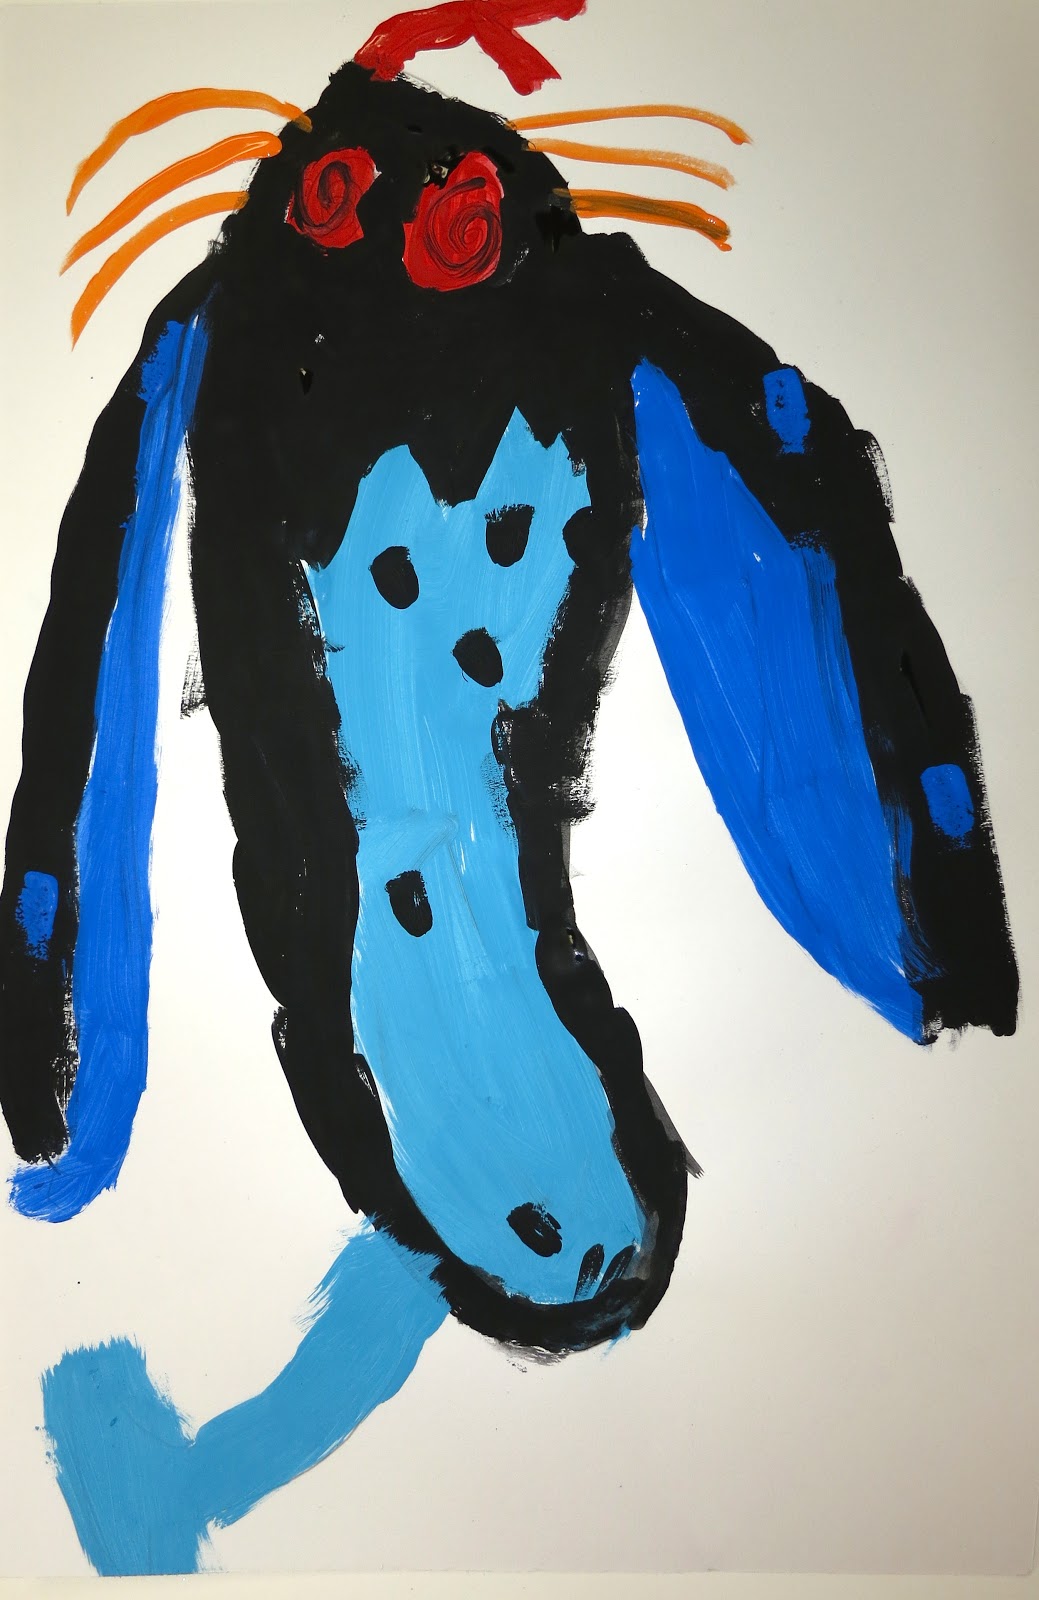
Sarcophagus and Mummy
It required the following:

  • Pictures of Sarcophaguses for reference
  • Pictures of Egyptian Hyroglyphics and Symbolism
  • Pencil 
  • Brown Craft Paper
  • Craft Acrylic or Tempera Paint and brushes
  • Wide Permanent Markers (All hail the Sharpie!)
  • A pre-made snack
  • A lot more time than we had

We looked at many pictures of Egyptian art and architecture but in the end settled on some of the most fascinating elements: the burial techniques and the beautifully decorated sarcophaguses.


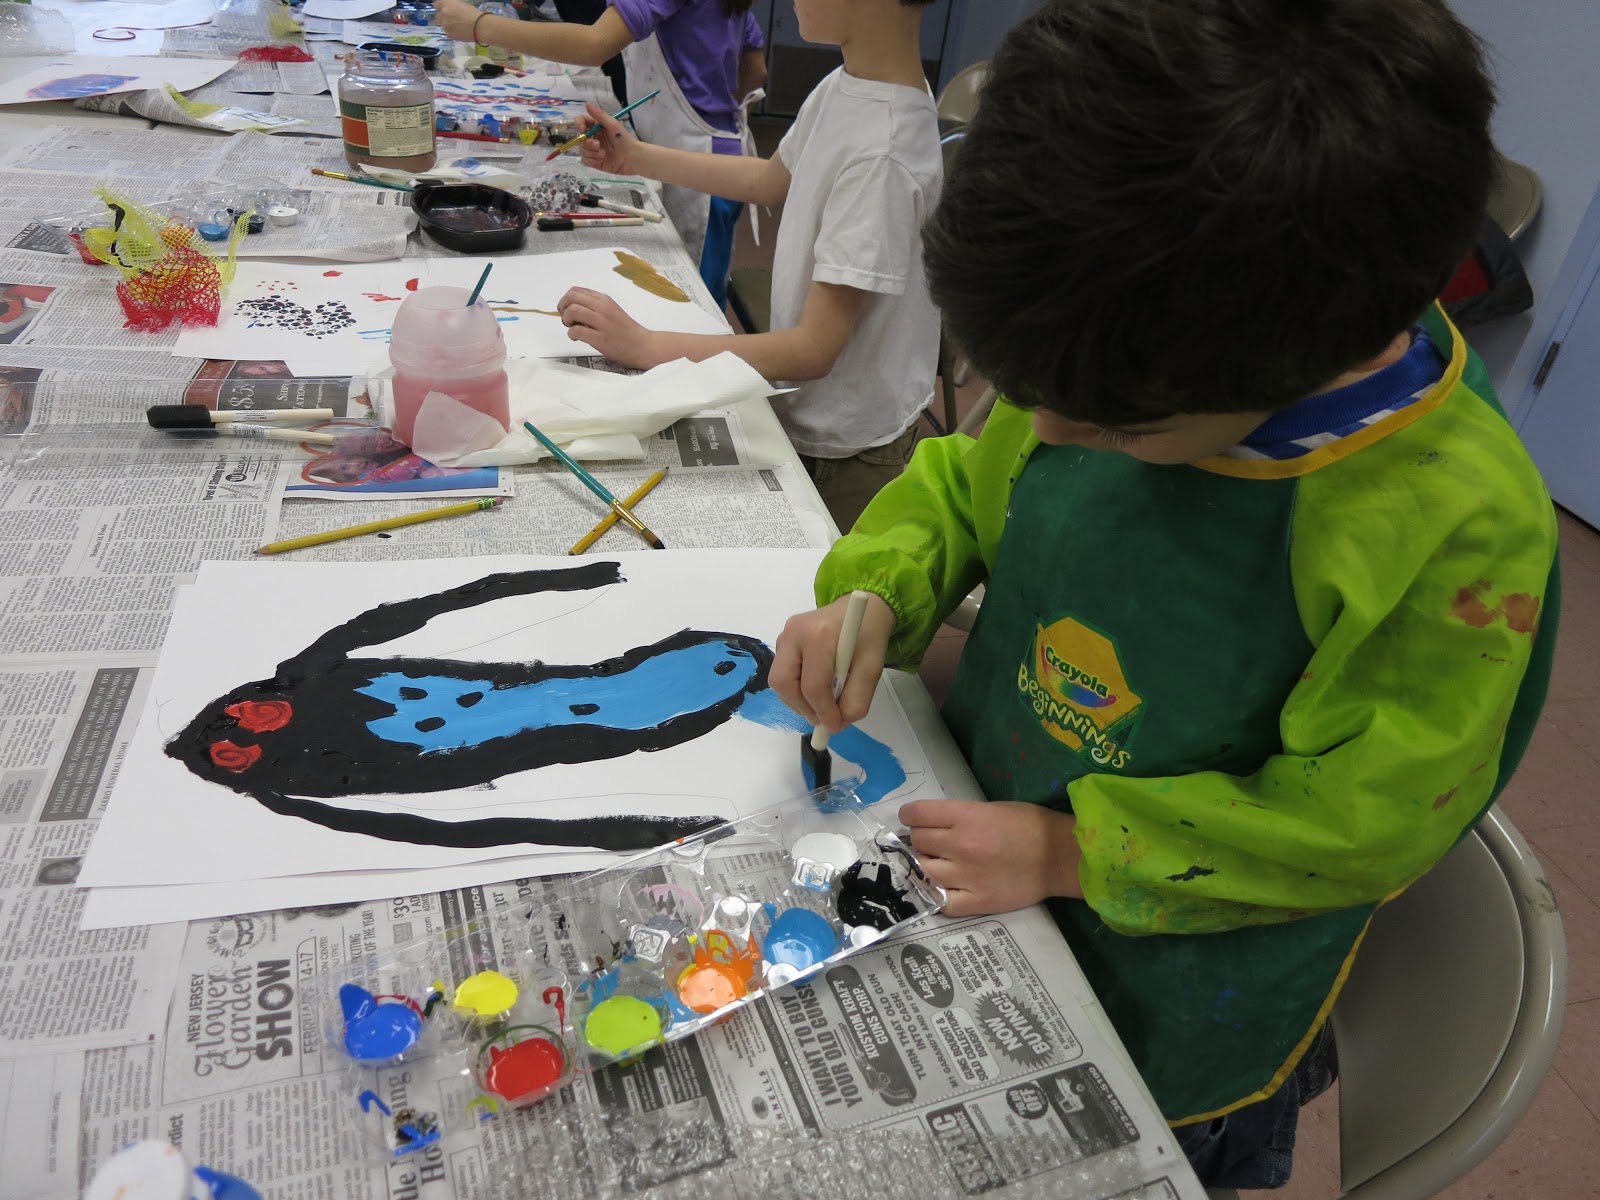
The children took turns lying on the ground on top of a strip of kraft paper and we drew their outline. Then we formed the shape into a  sarcophagus and the children drew in their faces and body shapes. I asked them to look at how the hair was drawn, the headdresses, the facial features and the symbols used on the bodies.  We discussed the symmetry of the design and I was excited to see one artist completely disregard this and make hers intentionally asymmetrical. The artists sketched in pencil first and dove right in to the paint. I bought a nice high quality gold and they loved using it.


As the paint dried we ate hummus, pita, and olives (along with fruit snacks and goldfish, of course) and played the mummy wrap game. This was a bigger hit than I imagined it would be and it was played several times.

Lastly we returned to our work stations and added detailing and outlines with our markers. A few kids chose to finish up their work on another day.

In hindsight I wish I'd saved this project for a regular art lesson rather than camp so the artists could have taken more into consideration: how to hold their arms, whether to give their sarcophagus a staff to hold, etc. But the artists created some very very beautiful work.


Tuesday, September 6, 2011

Russian Architecture

Russian Architecture: Day 2 of Art Camp

Time to recap another day of my first Picasso's Basement Art Camp.

On the second day of art camp we traveled to Russia. We looked at Russian architecture, some of which is noted for it’s Byzantine influences. Many of the more famous structures feature onion domes, bold colors, and arches. Working with only recycled items (shoe boxes, food boxes, paper towel rolls, and soda bottles) and some plastic baseballs covered with Paper Mache the artists began to paint patterns with craft acrylic paint. When it dried later they became architects and worked as a group to assemble their structure with I helped them glue together with a hot glue gun. VOILA!

Russian Building
Snacks were just sad that day. The children helped me bake (what should have been) delicious Russian teacakes. Unfortunately, I’m not Julia Child and I measured the flour incorrectly. They smelled delicious but they looked like this:
Bad Teacakes

Good Teacakes
Luckily I had a little of the batter left and I added some more flour. The next day we were able to enjoy them.

Nesting dolls were the next order of business. I used manila cardboard to cut out the shapes of nesting dolls and the children made all sorts: animals, constellations, and EEEK! serial killers (because when you don’t watch the kids as you clean up, those pop-culture themes just creep right in!)  But I won’t bother showing them here. The kids had fun with them but truthfully a good part of their energies that day were used on the Byzantine building. 
Lesson learned: One good project is all anyone needs!